My family lived in Cincinnati, Ohio for about four years when I was growing up. I may not remember a ton about living in Cincinnati, but there are three things that burned into my brain that I’ll never forget – coasters, memories with my sister Breanna, and a love for Cincinnati chili. I’ll give it to you, Cincinnati chili is an acquired taste but once you’ve acquired it, other chilis just don’t compare. Not even my all-time favorite white chicken chili recipe. The last time I was in Cincinnati during the summer of 2021 for a roller coaster extravaganza, we may have eaten cheese coneys four different times in two days. You’ve gotta fill up when you’re there! And you have to do coneys and spaghetti. And maybe even a burrito (did you know that was a thing!?!). My husband isn’t a huge fan of the quality of the ingredients used in traditional Skyline chili, so he came up with this version instead. If you really want the exact Skyline or Goldstar chili, you could just buy these cans of chili or this Cincinnati chili mix and use that instead. And for me a big fan, it’s close enough to the original to curb my cravings for Cincinnati chili when we can’t get back to Ohio often enough. And the best part of all is that the recipe is simple – meat + spices that simmer together for a while and that’s it.
Why You’ll Love This Recipe
Easy – It’s simple, delicious, and perfect for making homemade cheese coneys, 5-ways, or just eating with a bunch of oyster crackers. Great flavor – if you like the flavor of Cincinnati chili with its chocolate and cinnamon, you’ll love this. It has all of that flavor you love! Paleo friendly – while I know this doesn’t really matter to a lot of it (and probably not a lot of people who are searching for Cincinnati chili, this recipe does fit into a paleo eating plan! Just don’t eat it with crackers, hot dogs, or pasta – the way Cincinnati chili should be enjoyed.
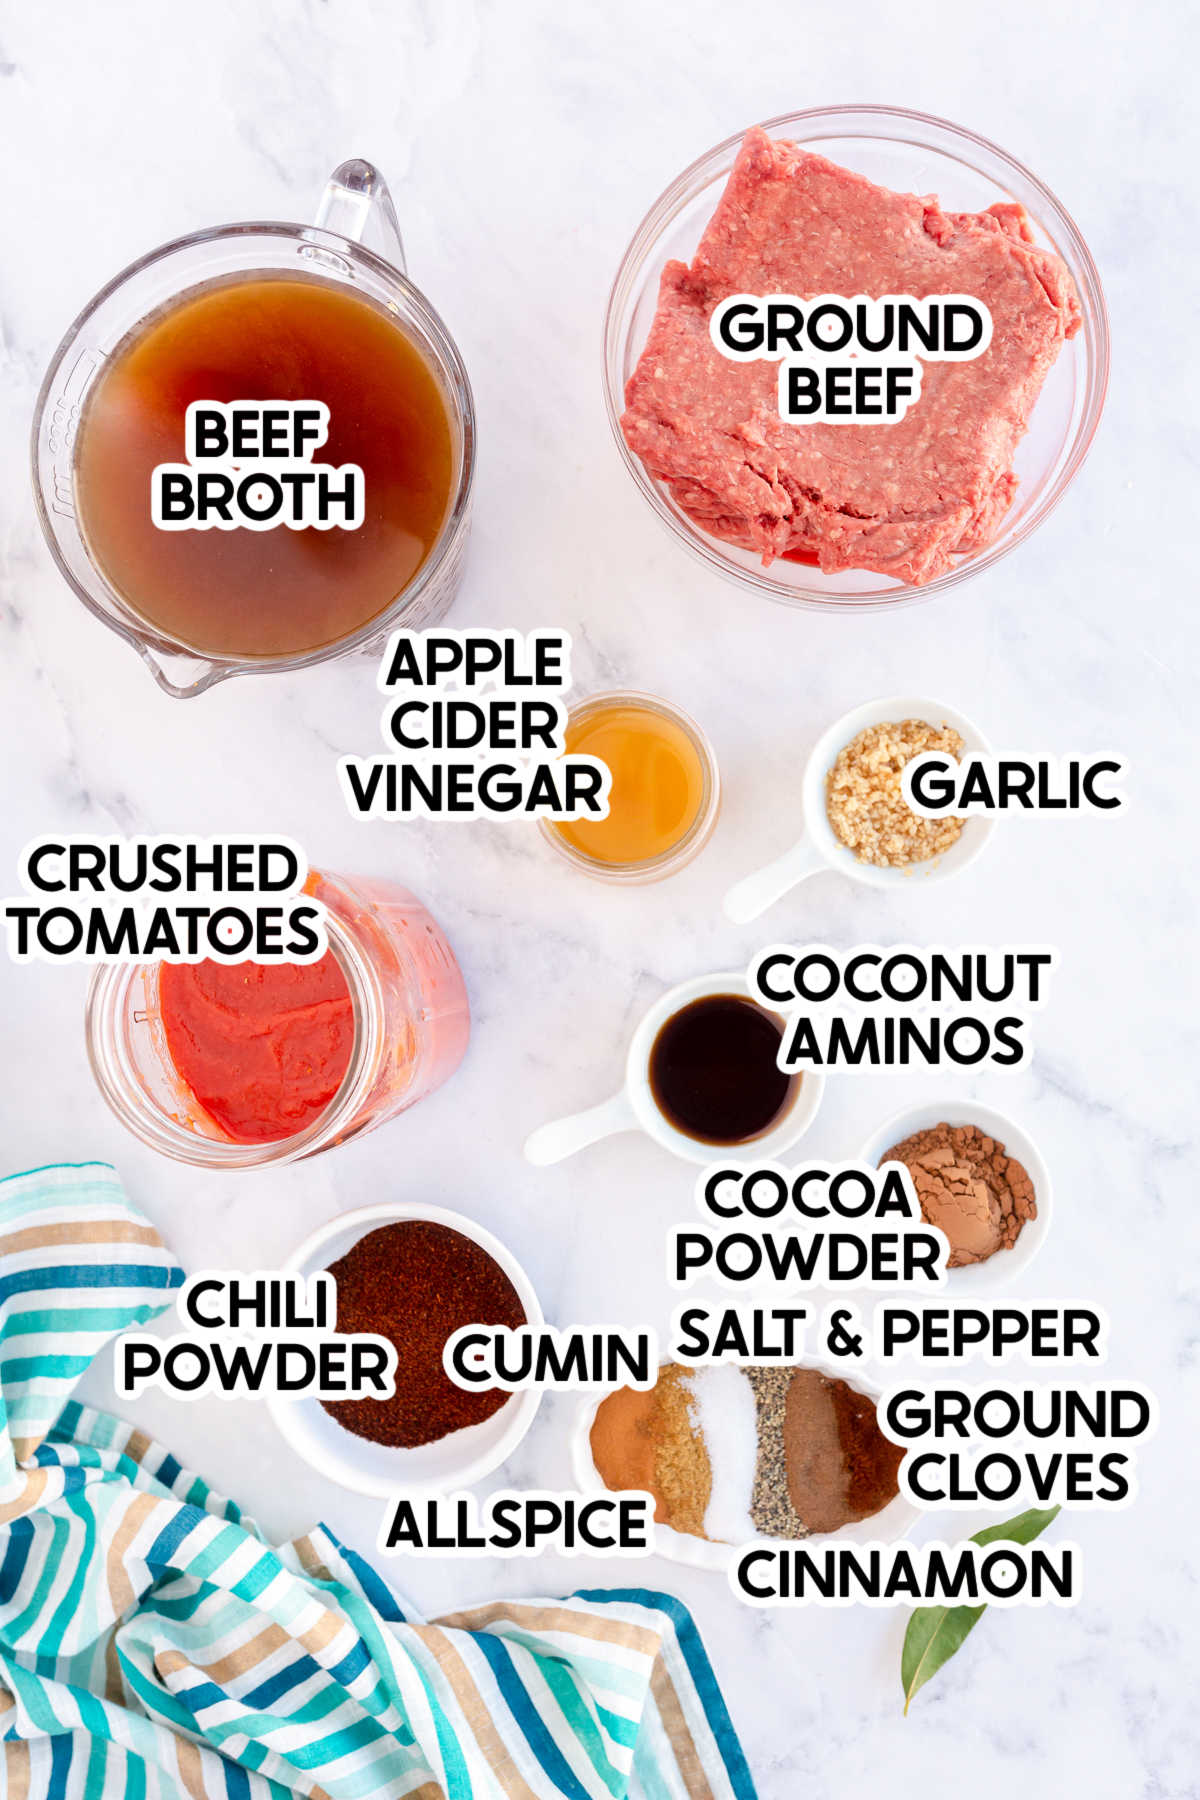
Cincinnati Chili Ingredients
Ingredient Notes
The thing that makes Cincinnati chili so unique is the ingredients. Unlike Texas chili or a traditional bean based chili, these are no beans. And the spices are way different than a traditional chili. They’re what makes it so delicious! For things that make sense, I’ve included notes on what we use or prefer to use. At the end of the day, as long you follow the recipe – you can use any brand you want!
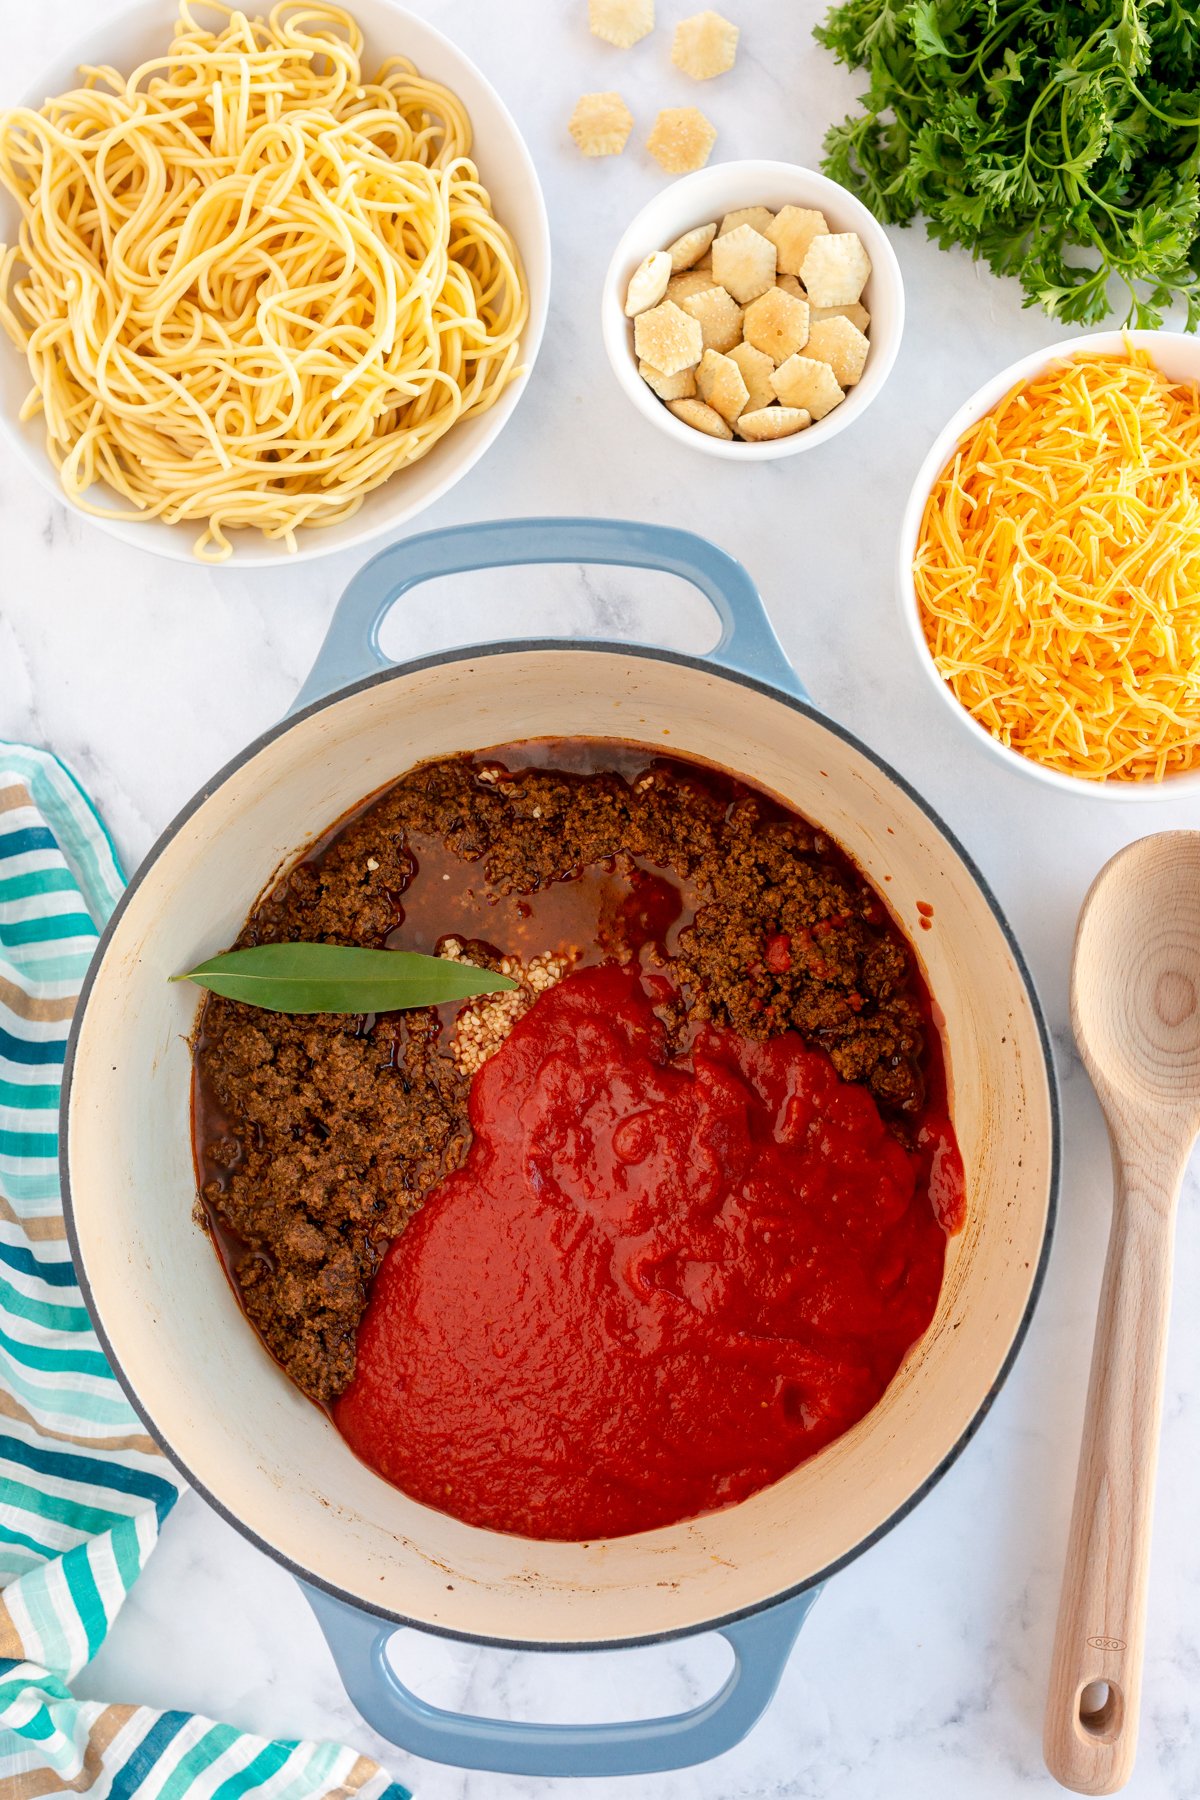
Ground beef – we prefer grass-fed but you can use whatever type of ground beef you wantBeef broth – go with the low sodium kind so your chili doesn’t end up too saltyCrushed tomatoes – puree until smooth or just used pureed tomatoesGarlic – fresh garlic mincedCoconut aminos – while we used coconut aminos, you could easily substitute these with worchestershire sauce as well. I think that’s what they use in traditional Cincinnati chili!
How to Make Cincinnati Chili
There’s really not a lot to making Cincinnati chili at home – it just takes time. The spices need time to soak into the meat, so while this is a simple recipe, it is time-consuming. Luckily, that time is inactive time just waiting for the meat to be ready.
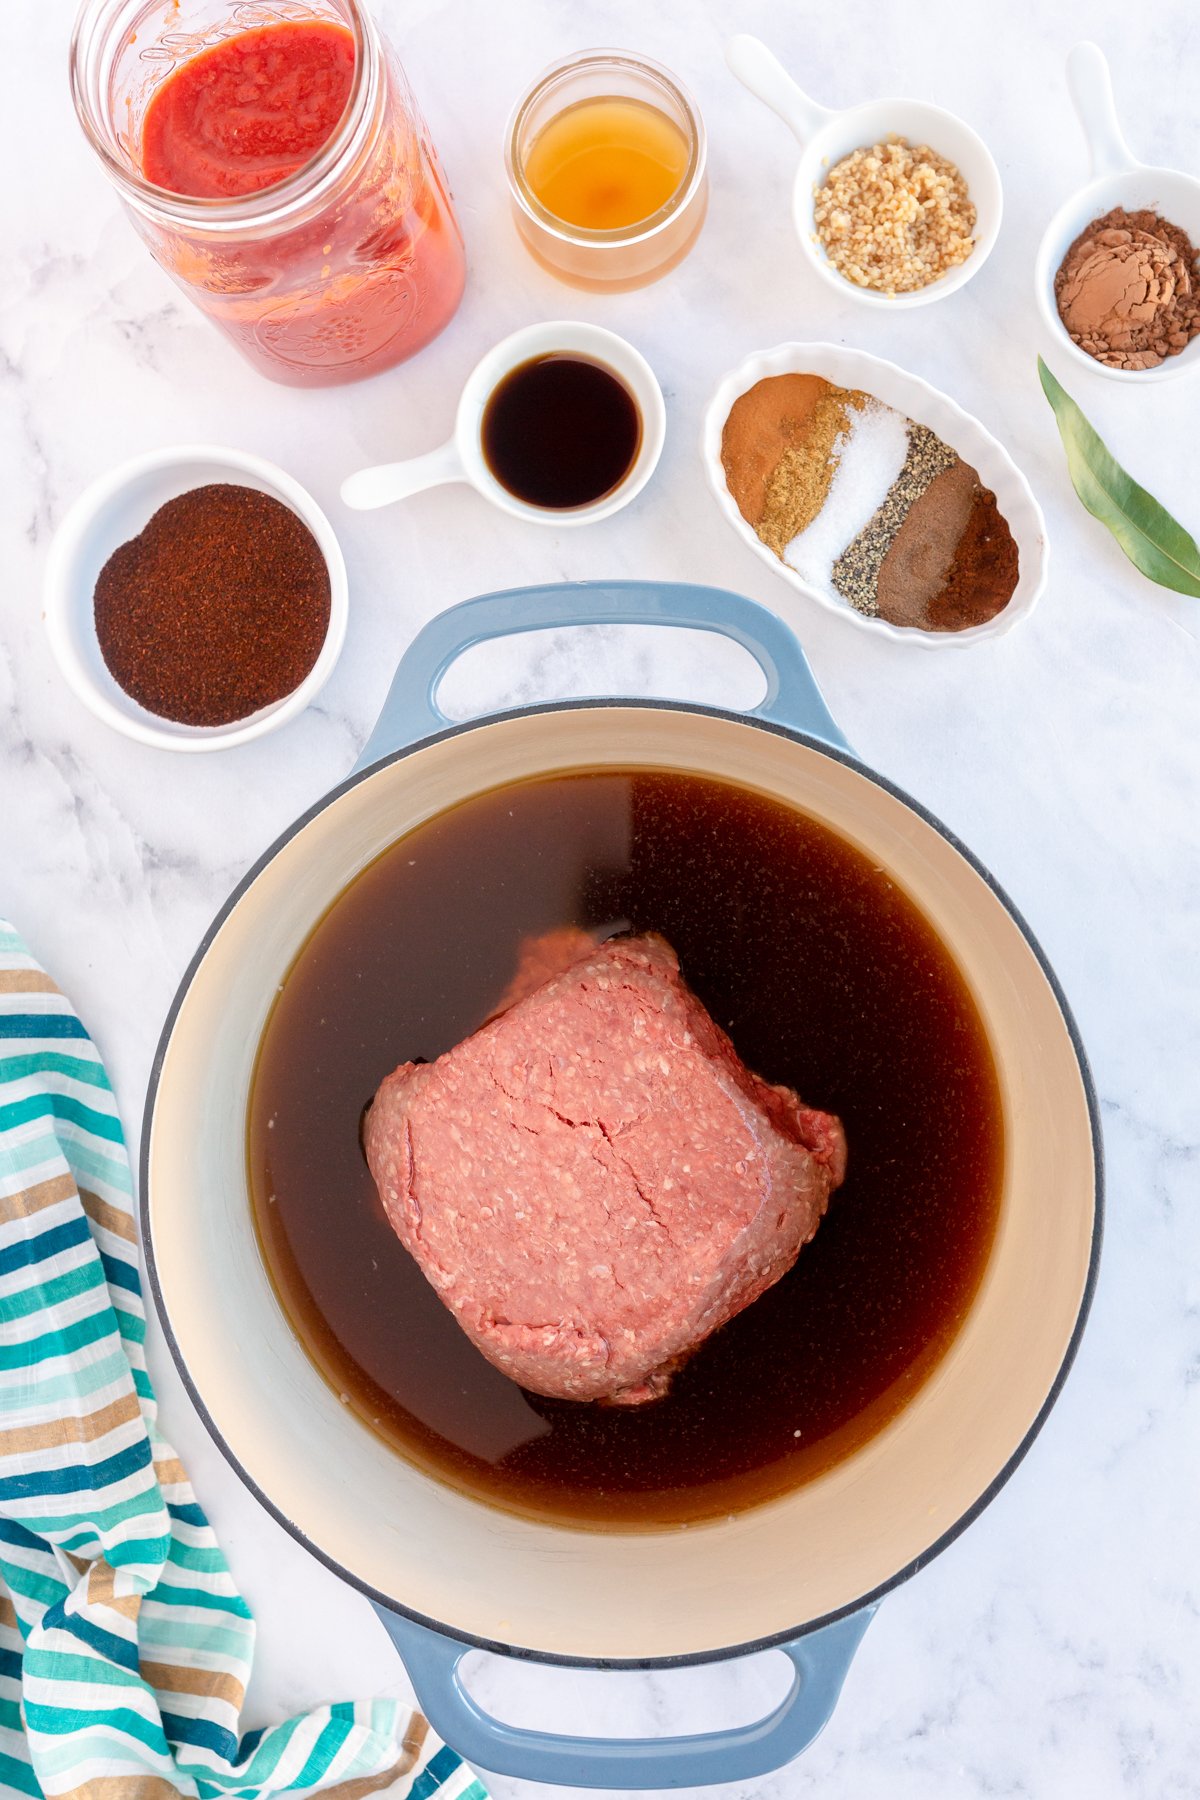
1 – Boil the Meat
Start by adding the beef and beef broth to a six quart pot (or something bigger is fine too). Break the beef up into tiny pieces – this is a signature part of Cincinnati chili!
You can do this with a fork or you can use your hands (I recommend gloves), so that it almost dissolves into the broth. Raise the temp to high and bring to a boil. Once boiling, decrease to a simmer and simmer for half an hour, stirring regularly so the meat at the bottom of the pan doesn’t burn.
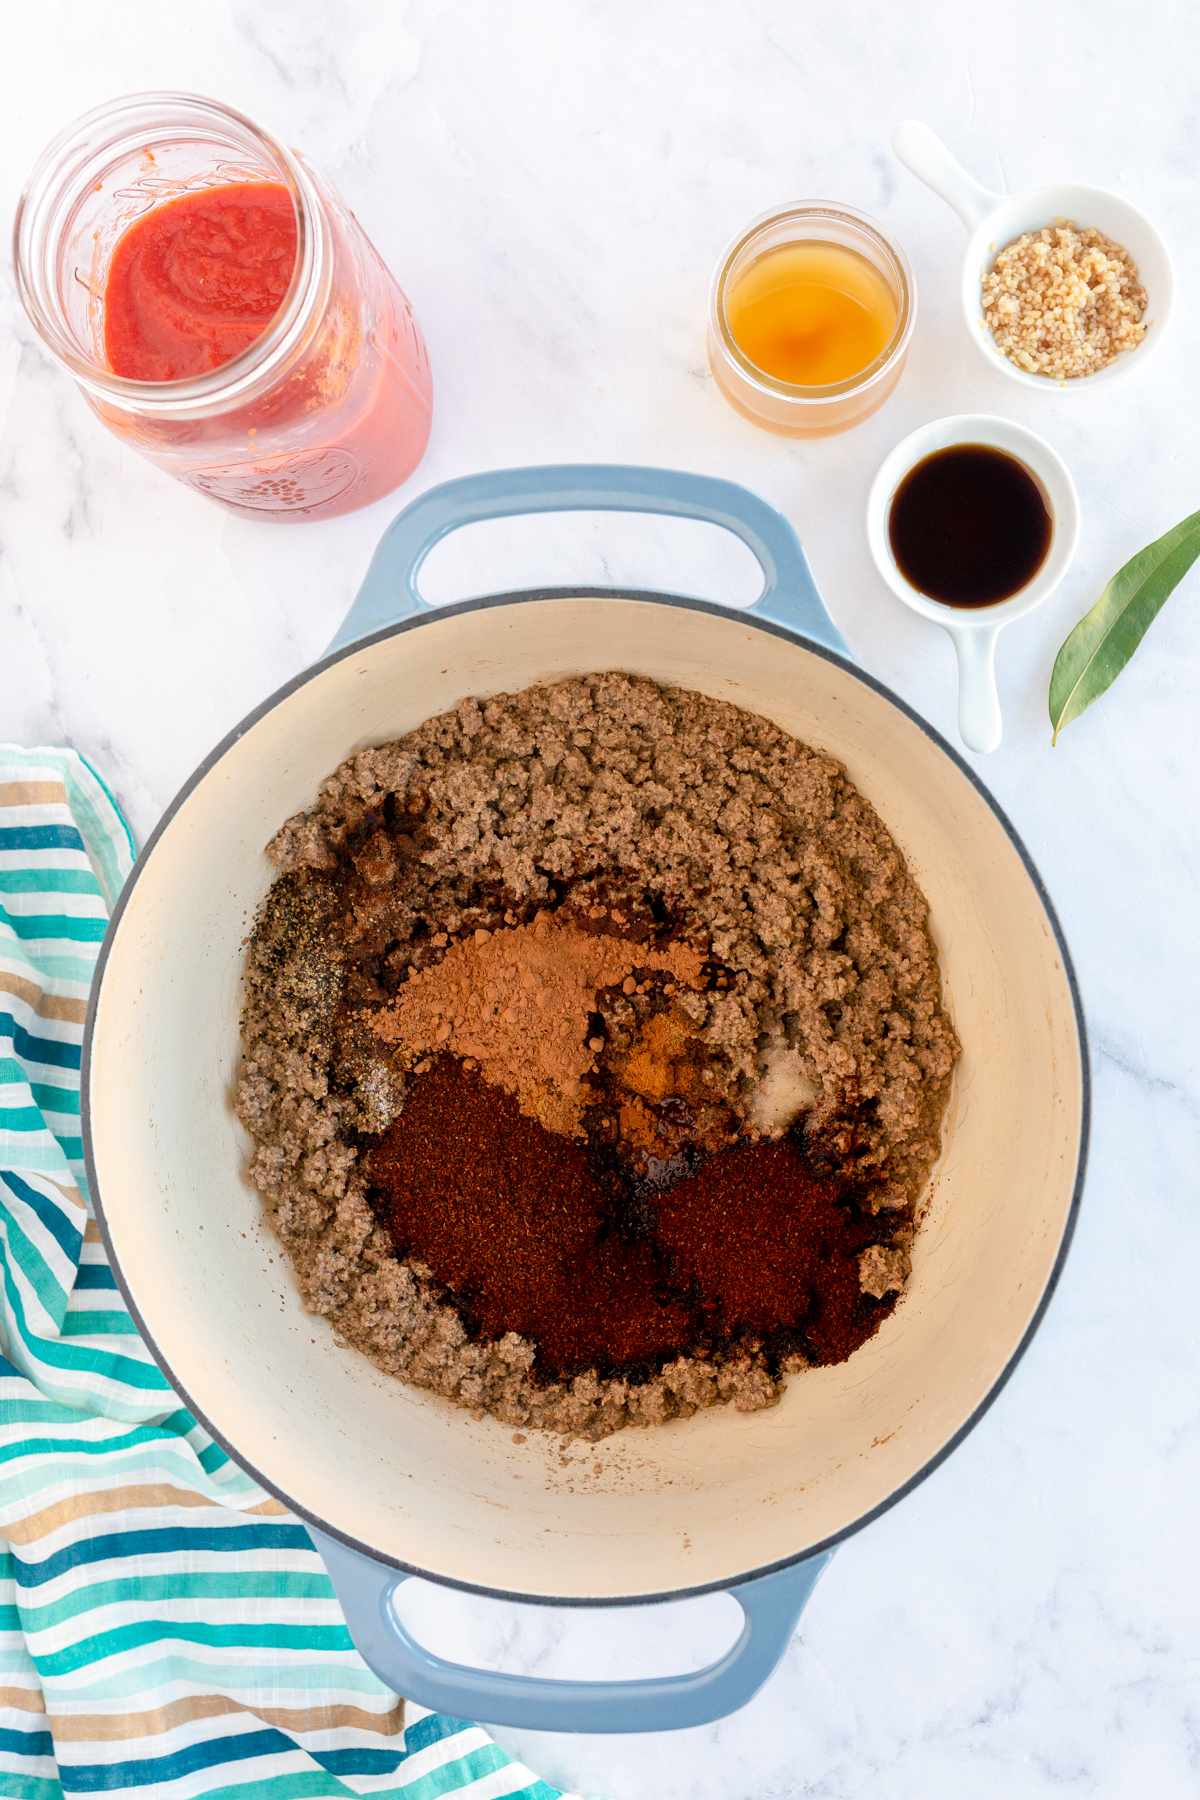
2 – Add spices
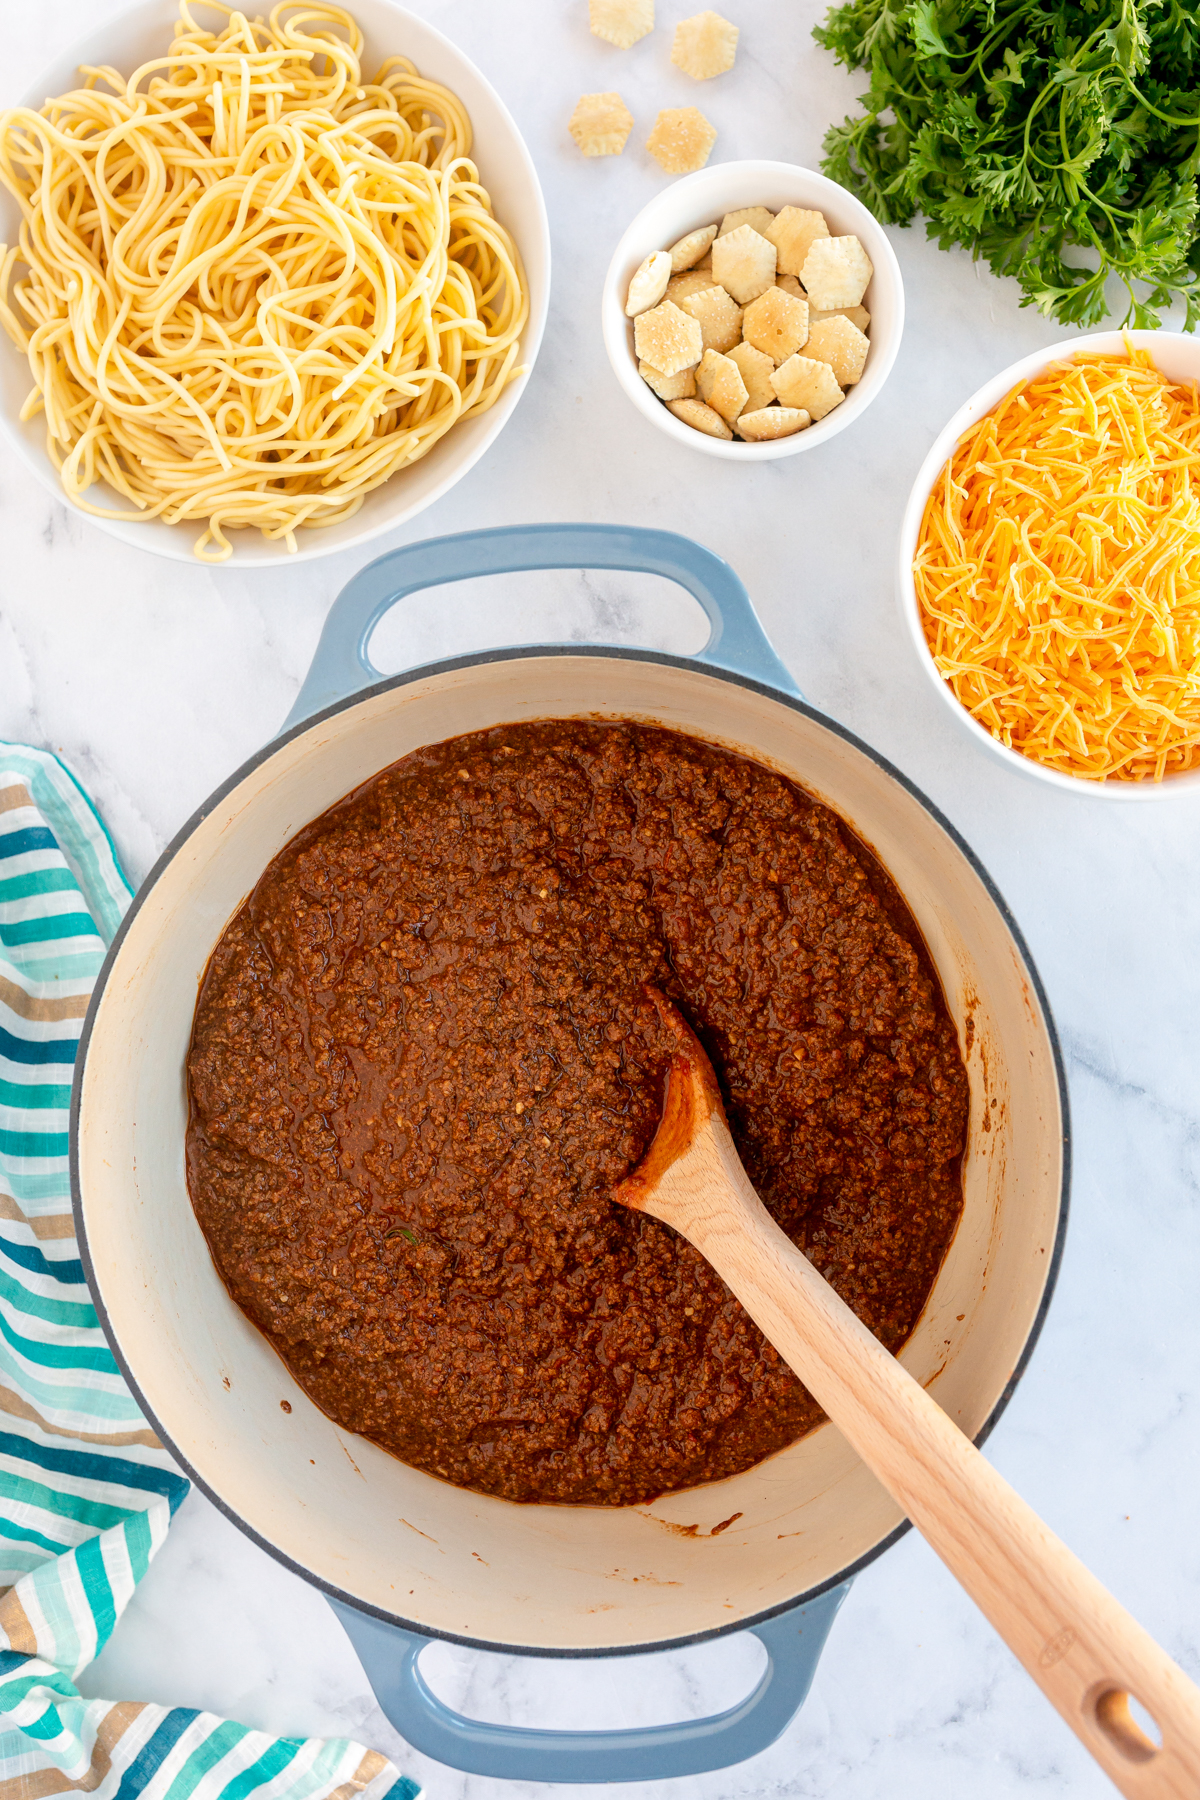
Next you’re going to start adding some actual seasonings to the beef. Start by adding all of your dry ingredients to the beef then stir to combine.
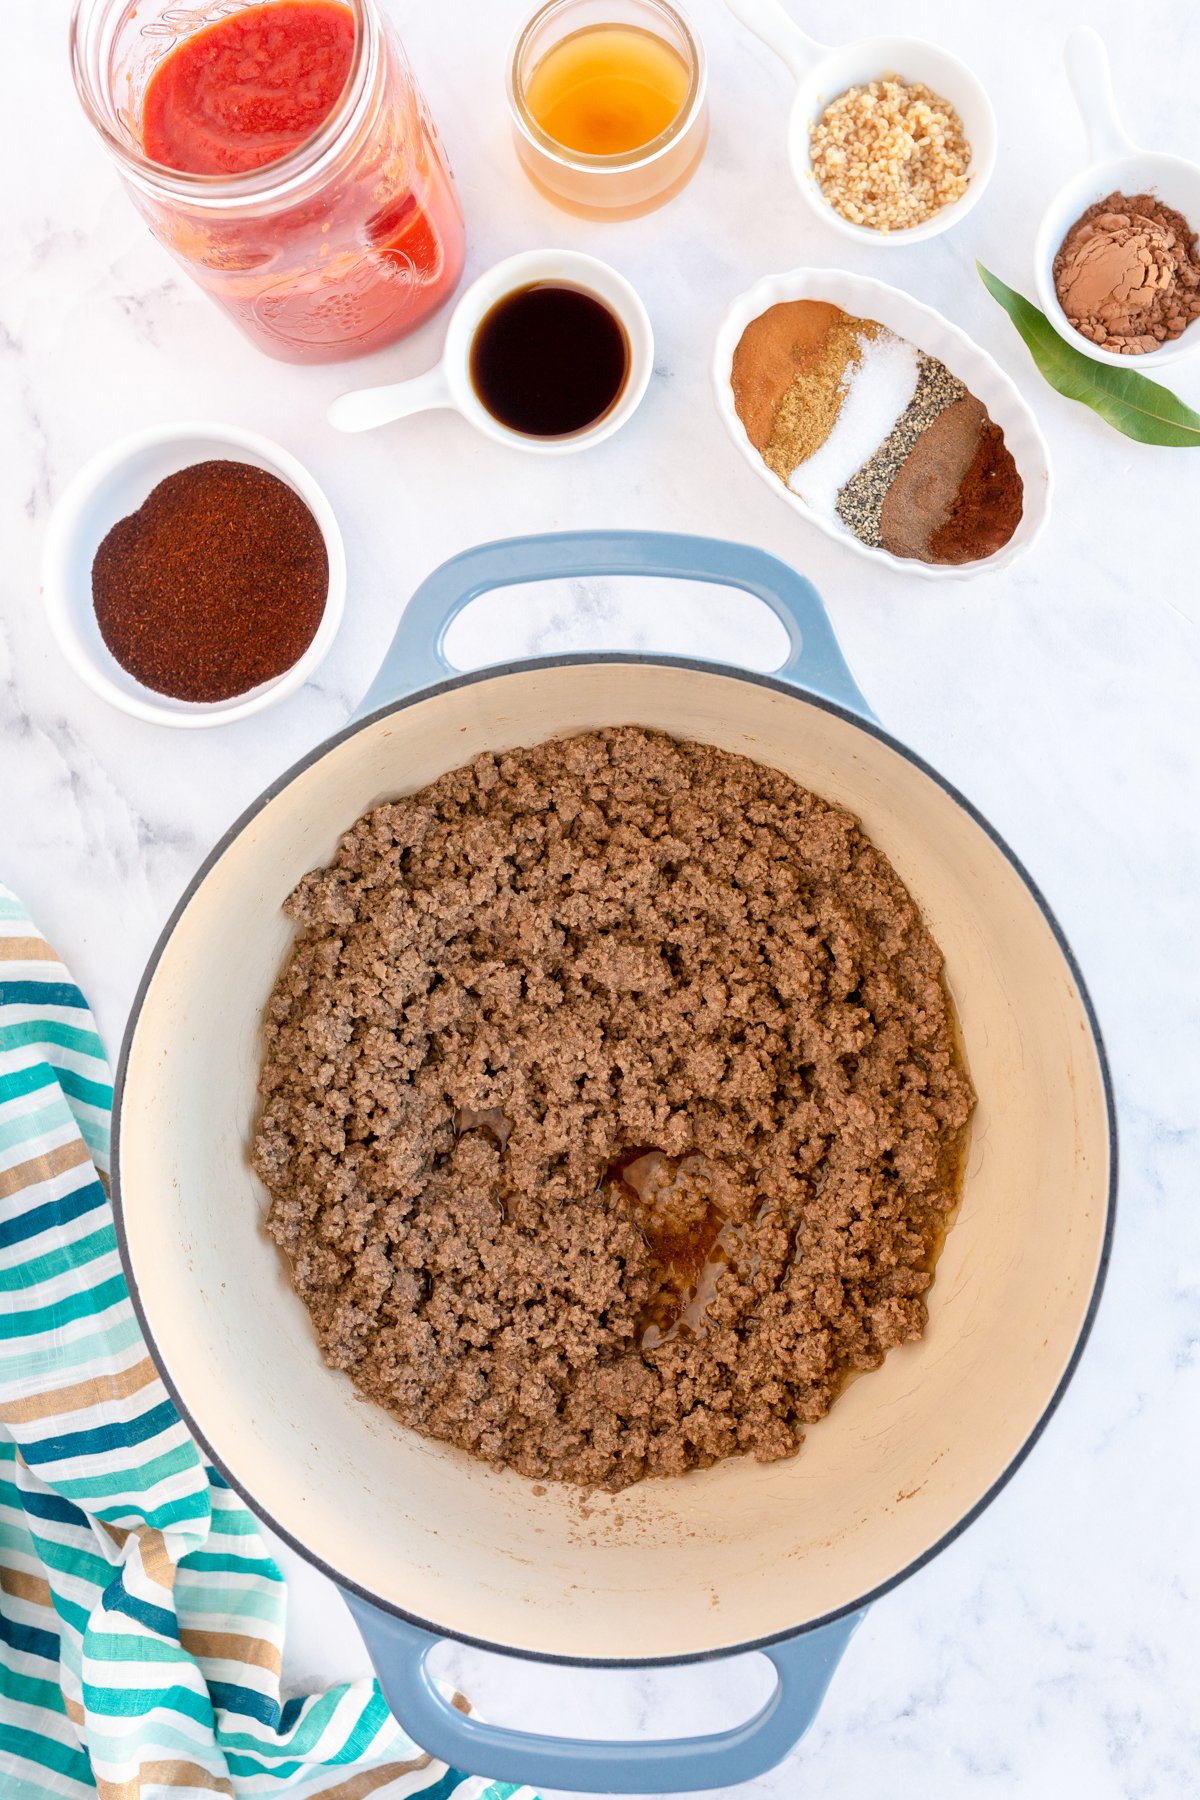
3 – Finish & Enjoy the Chili
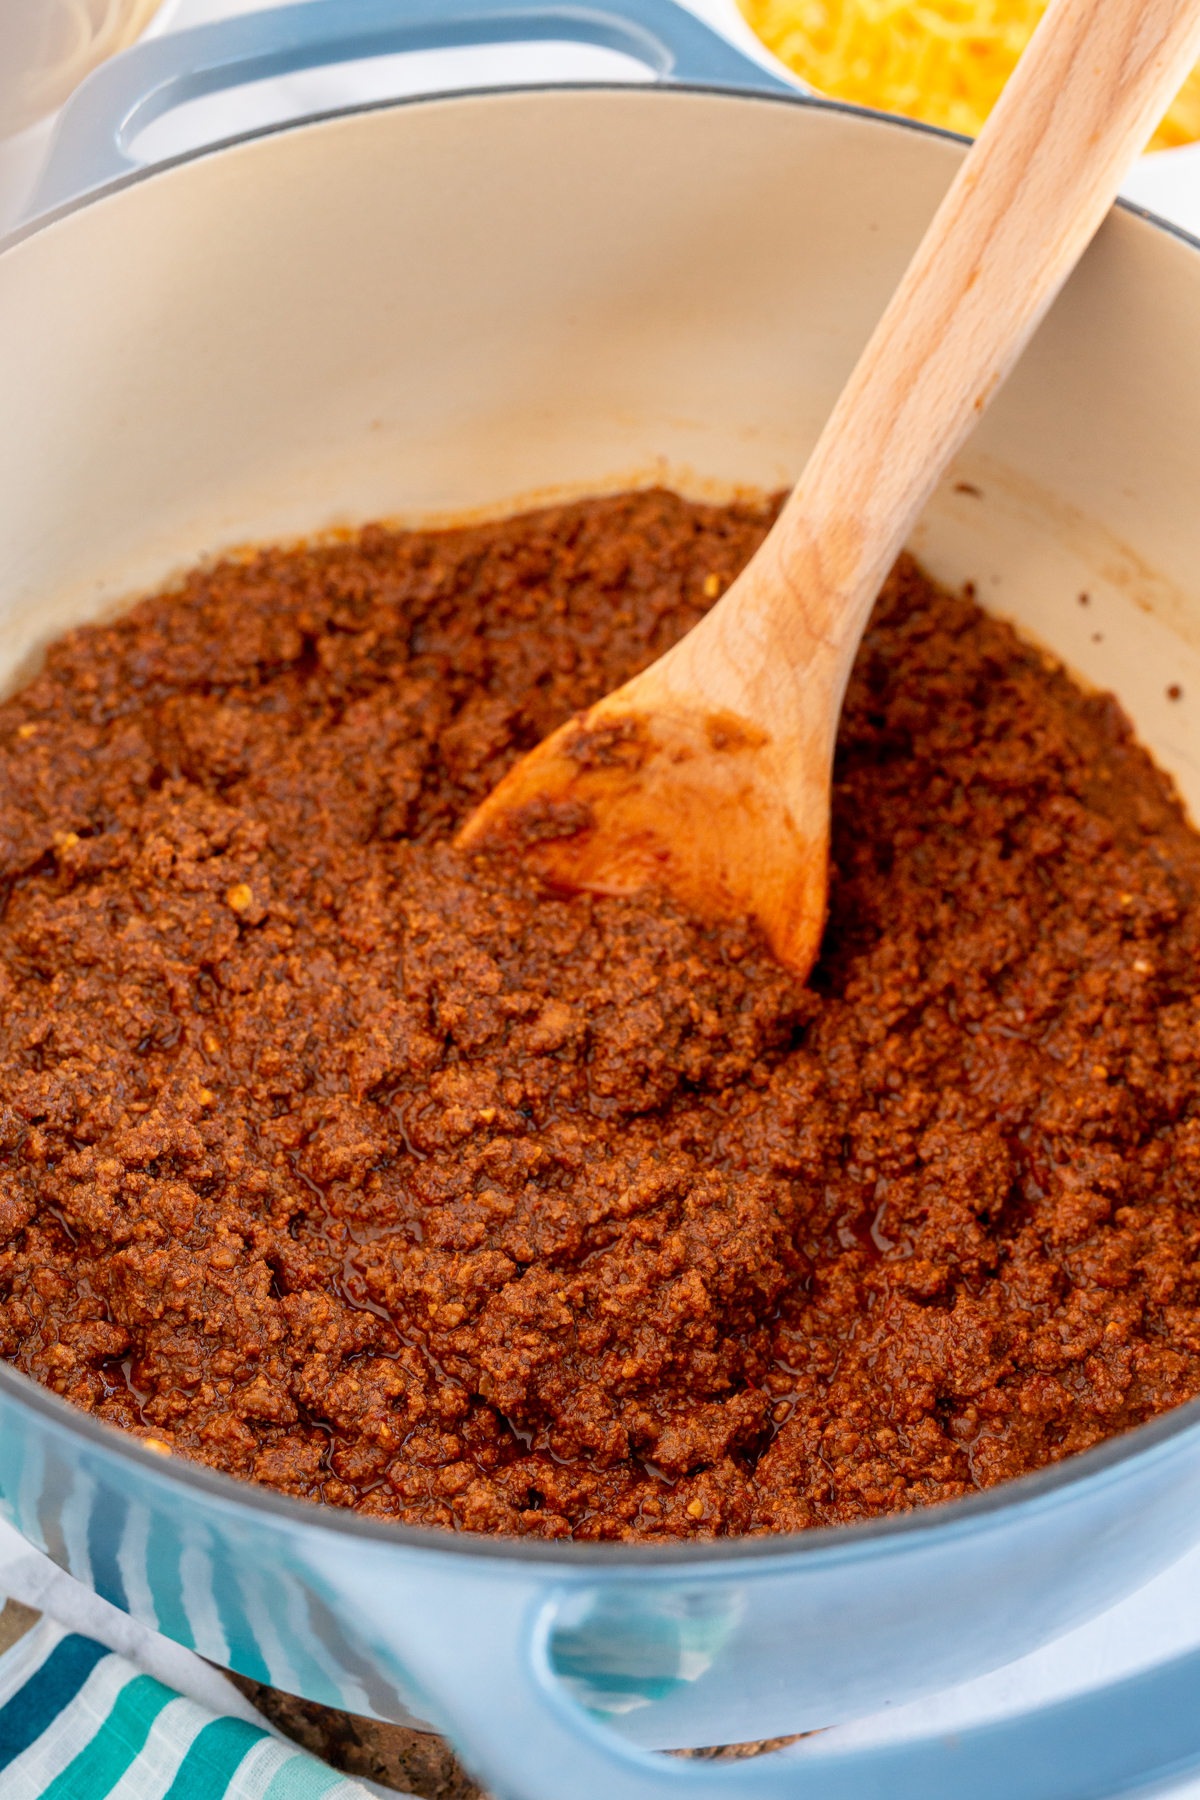
Next, add all of the remaining wet ingredients (crushed tomatoes, vinegar, and coconut aminos) to the mixture and stir to combine. Reduce the heat to medium low and allow to simmer for another three hours (told you it takes a while), stirring every so often to keep it from burning. If the chili ever thickens up too much, add a cup of water and stir to combine. Remove from heat after the three hours and allow to cool until cooled enough to eat. If you’re a Cincinnati chili newbie, this is just the beginning of the goodness. Make sure to keep reading to see the best ways to enjoy Cincinnati chili – it’s not just by itself.
What to Eat with Cincinnati Chili
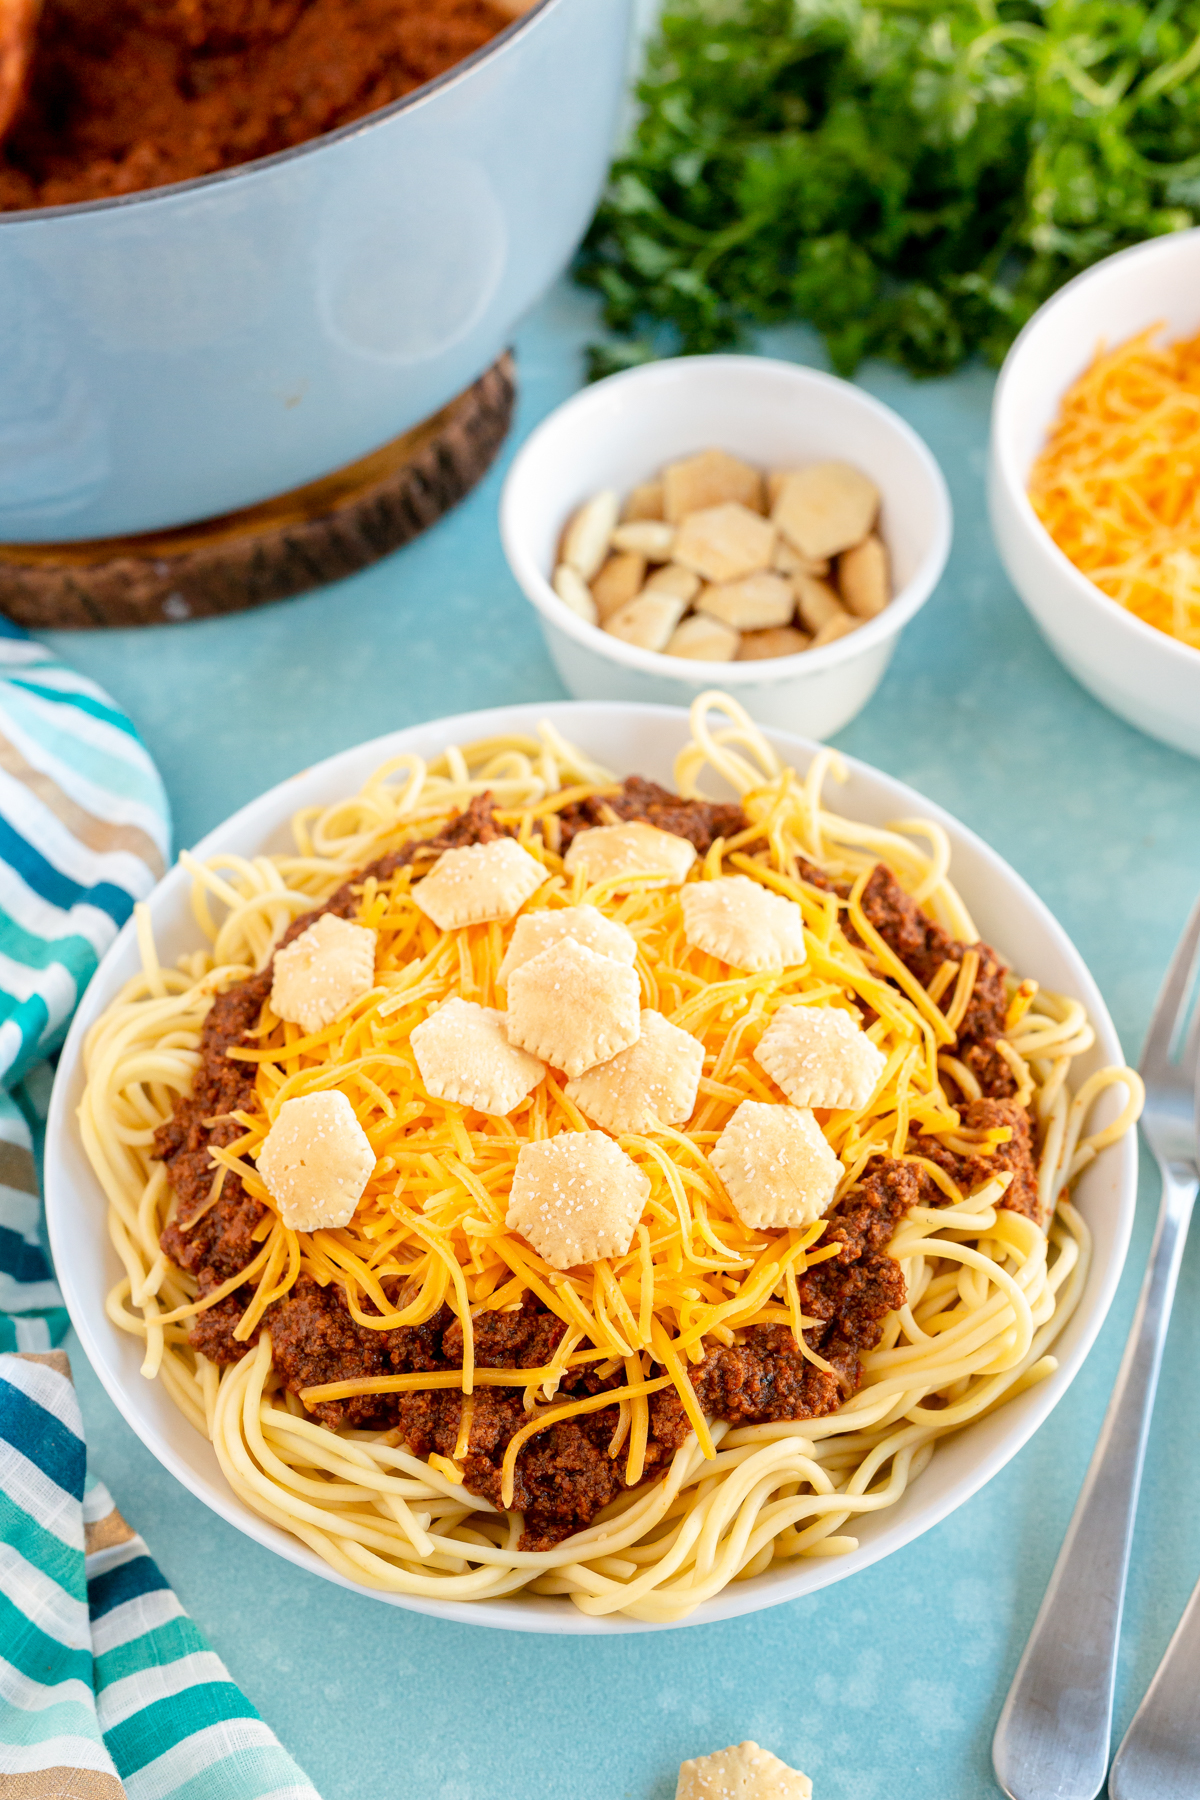
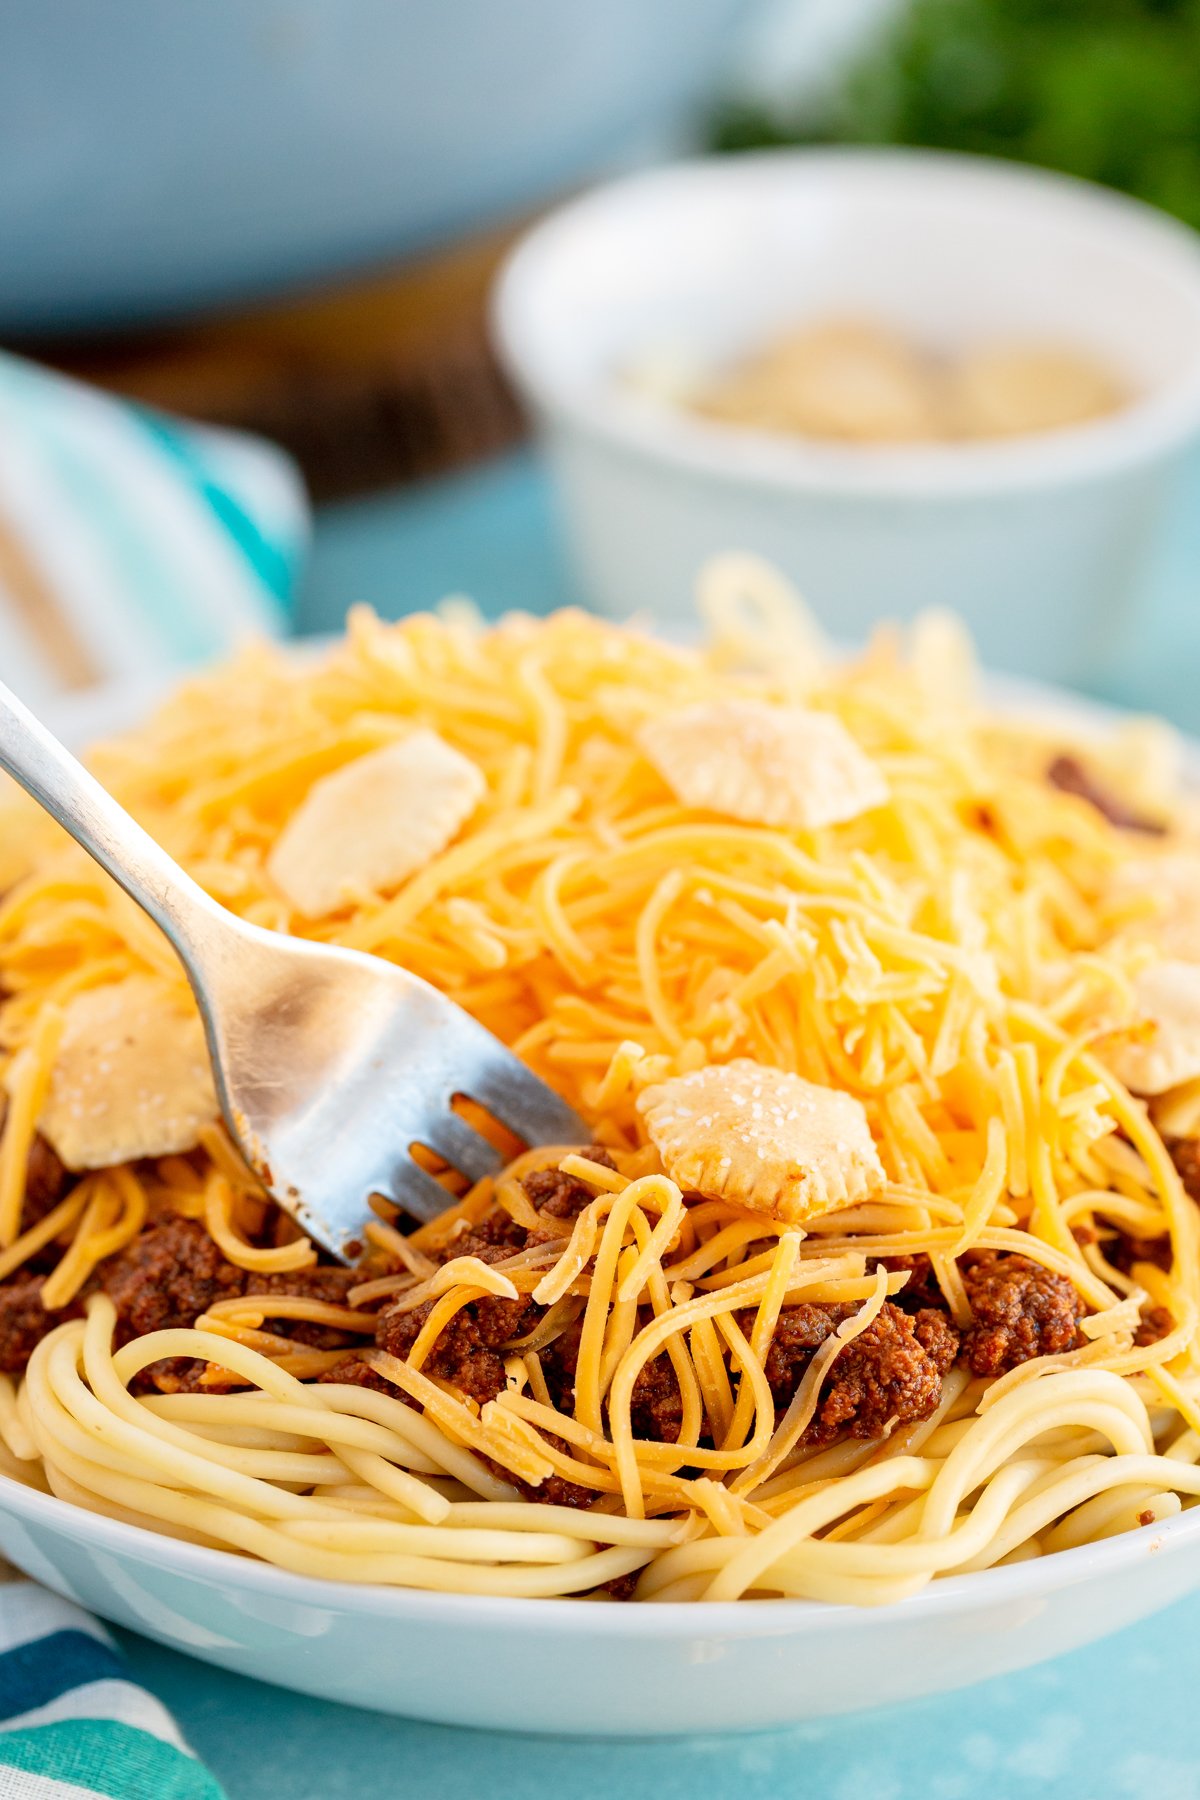
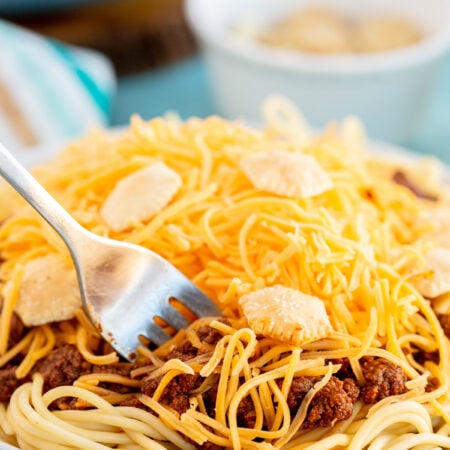
There are two iconic ways to eat Cincinnati chili – one is as a cheese coney and probably the most popular way. Let me just set the record straight – a cheese coney is a not a chili dog. While it is a hot dog topped with chili, they’re just different. A cheese coney is typically a hot dog bun with a hot dog, chili on top, and lots and lots of freshly shredded cheddar cheese on top. But don’t stop there – most people get it with mustard and/or onions. I skip the onions for obvious reasons but plenty of people enjoy them. The final touch is to add oyster crackers on top. It’s not a cheese coney without the oyster crackers in my book. The second most iconic way to eat Cincinnati chili is over spaghetti. You can typically order it one of three different ways depending on what toppings you want.
3-way – Spaghetti, chili, and cheese4-way – Spaghetti, chili, cheese, and onions5-way – Spaghetti, chili, cheese, beans, and onions
Don’t knock this until you try it. I typically get a few cheese coneys and a 3-way to round out my meal. Oh and don’t forget the oyster crackers, they’re also good on top of this. The last time we were in Cincinnati, they also had a chili burrito on the menu, which sounds insane but was actually really good! So you could try that as well! Or any other way of eating with the chili. If none of those ways of eating the chili sound good to you, you can always just eat it with chips or over this honey cornbread. Just know you’re breaking my heart.
Expert Tips
Keep a pitcher of water on hand near the stove so that if you do find the chili getting too thick, it’s easy to add a little water to thin it out. Make sure that you simmer the chili, not boil it. Simmering means that it’s just before a boil so if you actually have boiling going on, turn it down a tad. Boiling won’t give you the same result as simmering. Store chili in the refrigerator for up to five days before throwing away or freezing. Freeze any leftover chili in a freezer safe container for up to three months. Even better if you do it in individual servings so that you can thaw as much as you need. When you’re ready to thaw, let thaw overnight in the refrigerator. Add a little beef broth and place it in a warm oven. Set the oven to 350 degrees and let it come to temp with the oven. Stir once or twice and enjoy once warmed.
More Delicious Ground Beef Recipes
If you like ground beef, make sure to try out these yummy dinner recipes!
Cheese filled meatballs – these delicious ground beef meatballs are stuffed ooey gooey mozzarella cheese! Taco dip with meat – a layered taco dip that includes homemade taco meat, caramelized corn, and more! Grape jelly meatballs – the easiest meatballs ever, just toss them in the crockpot and cook! Shepherd’s pie – this delicious dish is a great way to use leftover beef and mashed potatoes! Sweet spaghetti sauce – not your traditional spaghetti sauce, this one is sweet and delicious!